TL;DR:
- Most home cooks use a 1:1.5 ratio of rice to water for white long-grain rice on the stovetop. Consistent measurement with the same cup for rice and water is more important than the exact ratio, especially when scaled for different batch sizes.
For most home cooks, the go-to rice-to-water ratio is 1 cup rice to 1½ cups water on the stovetop for white long-grain, jasmine, or basmati. Rice cookers and sealed pressure cookers need less, typically 1:1 to 1:1.25, because no steam escapes. Brown rice requires more hydration and a longer cook time. One cup of dry white rice yields about 3 cups cooked, so plan accordingly when scaling for a crowd.
- White long-grain (stovetop): 1 cup rice : 1½ cups water
- Rice cooker or Instant Pot (most varieties): 1 cup rice : 1 to 1¼ cups water
- Brown rice (stovetop): 1 cup rice : 1¾ to 2¼ cups water
One rule that matters more than the ratio itself: use the same measuring cup for both rice and water. The absolute size of the cup is less important than keeping the proportion consistent. Apexapro's free rice-scaler tool handles all the conversions and method adjustments automatically, which is useful once you start scaling beyond two cups.
Table of Contents
- What's the right rice-to-water ratio for every rice type?
- How to apply the ratio for each cooking method
- How to measure rice and water accurately and scale recipes
- Should you rinse rice, and how does it change the water amount?
- Quick fixes when your rice goes wrong
- How altitude, pot type, and added ingredients affect the ratio
- How the Apexapro rice-scaler formula works
- Key Takeaways
- Why consistency beats memorizing every ratio
- The free Apexapro rice-scaler makes scaling effortless
- Useful sources
What's the right rice-to-water ratio for every rice type?
The table below covers the most common varieties. Times are stovetop unless noted, and yield is per 1 cup dry rice.
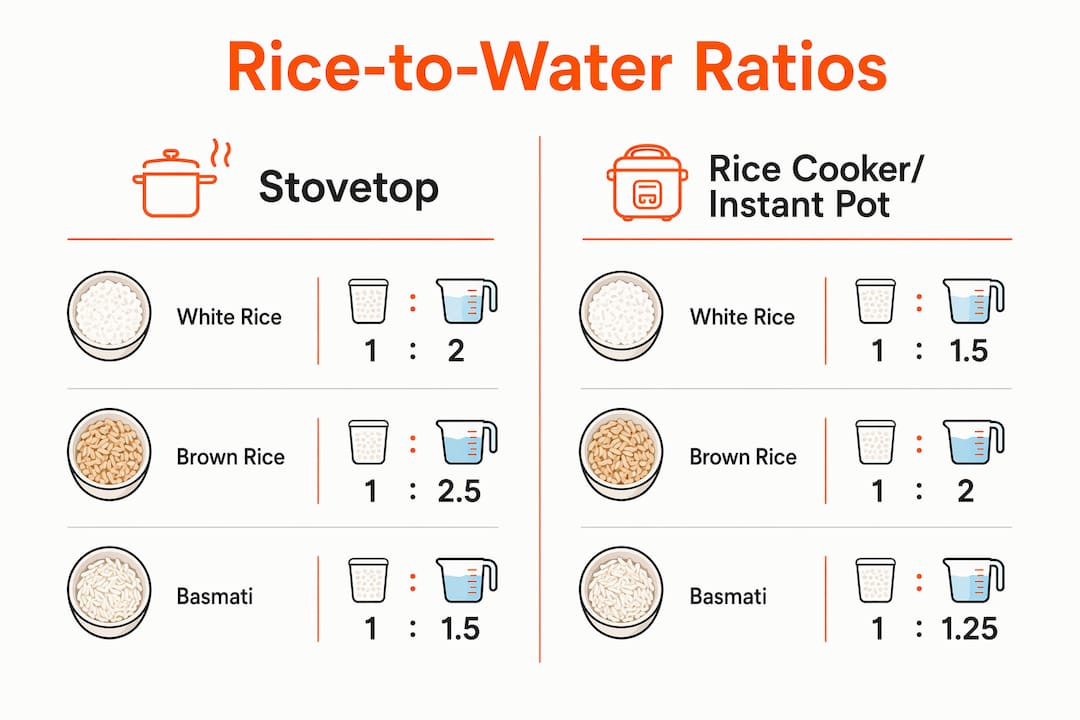
| Rice Type | Stovetop Ratio | Rice Cooker / Instant Pot | Cook Time (stovetop) | Yield (cooked) | Texture Goal / Notes |
|---|---|---|---|---|---|
| White long-grain | 1 : 1½ | 1 : 1 to 1 : 1¼ | 15–18 min | ~3 cups | Fluffy, separate grains |
| Jasmine | 1 : 1½ | 1 : 1 to 1 : 1¼ | 15–18 min | ~3 cups | Slightly soft, fragrant; rinse lightly |
| Basmati | 1 : 1½ | 1 : 1¼ | 15–18 min | ~3 cups | Fluffy, elongated; soak 20–30 min for best texture |
| Short-grain / sushi | 1 : 1¼ to 1 : 1½ | 1 : 1 | 15–18 min | 3 cups | Sticky, cohesive; low amylose drives cling |
| Arborio (risotto) | Add stock gradually | Not recommended | 18–22 min | 3 cups | Creamy; absorption method differs |
| Brown rice | 1 : 1¾ to 1 : 2¼ | 1 : 1¼ to 1 : 1½ | 40–45 min | 3–4 cups | Chewy, nutty; soak 30 min to reduce time |
| Parboiled | 1 : 2 to 1 : 2½ | 1 : 1½ | 20–25 min | 3–4 cups | Firm, separate; follow package for best results |
| Wild rice | 1 : 3 | 1 : 2½ | 40–50 min | 3–4 cups | Chewy, earthy; technically a grass seed |
A note on texture: high-amylose varieties like basmati stay fluffy because their starch resists gelatinizing into a sticky mass. Short-grain and sushi rice have low amylose, which is exactly why they clump. The ratio is the same ballpark, but the science behind the texture is different.
Sealed cookers change the math significantly. Rice cookers and pressure cookers typically need 1:1 to 1:1.25 for long-grain whites because no water escapes as steam. On an open stovetop, evaporation is the main reason you add extra water at all.
How to apply the ratio for each cooking method
Stovetop
- Measure rice and water using the same cup.
- Rinse if desired (see the rinsing section below), then drain well.
- Combine rice and cold water in a heavy-bottomed pot. Add a pinch of salt and a small drizzle of oil or butter to reduce sticking.
- Bring to a boil over medium-high heat, uncovered.
- Reduce heat to the lowest setting, cover tightly, and simmer 15–18 minutes for white rice.
- Turn off the heat. Leave the lid on and rest for 10 minutes before fluffing with a fork.
Pro Tip: Place a clean kitchen towel between the pot and the lid before the rest period. The towel absorbs excess condensation that would otherwise drip back onto the rice and create a gummy top layer — a simple trick that replicates a rice cooker's steam-release behavior.
Rice cooker
- Measure rice using the cooker's included cup (often 180 ml, not a standard U.S. cup — use it consistently for both rice and water).
- Rinse if desired, drain, then add to the bowl.
- Fill water to the corresponding line on the bowl, or use a 1:1 ratio by volume.
- Press cook. The cooker switches to "warm" automatically when done.
- Rest on "warm" for 10 minutes, then fluff.
Rice cookers are the most forgiving method for beginners because they eliminate the guesswork around heat control and timing.
Instant Pot / pressure cooker
- Rinse rice and add to the pot with water at a 1:1 ratio for white rice, 1:1.25 for brown.
- Seal the lid and set the valve to "sealing."
- Cook on high pressure: 3 minutes for white rice, 22–25 minutes for brown.
- Allow a natural pressure release for 10 minutes, then carefully release any remaining pressure.
- Fluff and serve.
Oven method
- Preheat oven to 375°F.
- Combine rinsed rice and boiling water (1:1.5 ratio) in an oven-safe dish with a tight lid or foil cover.
- Bake 25–30 minutes for white rice, 55–60 minutes for brown.
- Rest covered for 5 minutes before serving.
Microwave
- Combine rice and water (1:2 ratio) in a large microwave-safe bowl — rice expands significantly.
- Microwave uncovered on high for 5 minutes, then at 50% power for 15 minutes.
- Cover loosely and rest 5 minutes before fluffing.
The microwave method works best for single servings. Larger batches cook unevenly, so the stovetop or rice cooker is a better call for four or more cups.
How to measure rice and water accurately and scale recipes
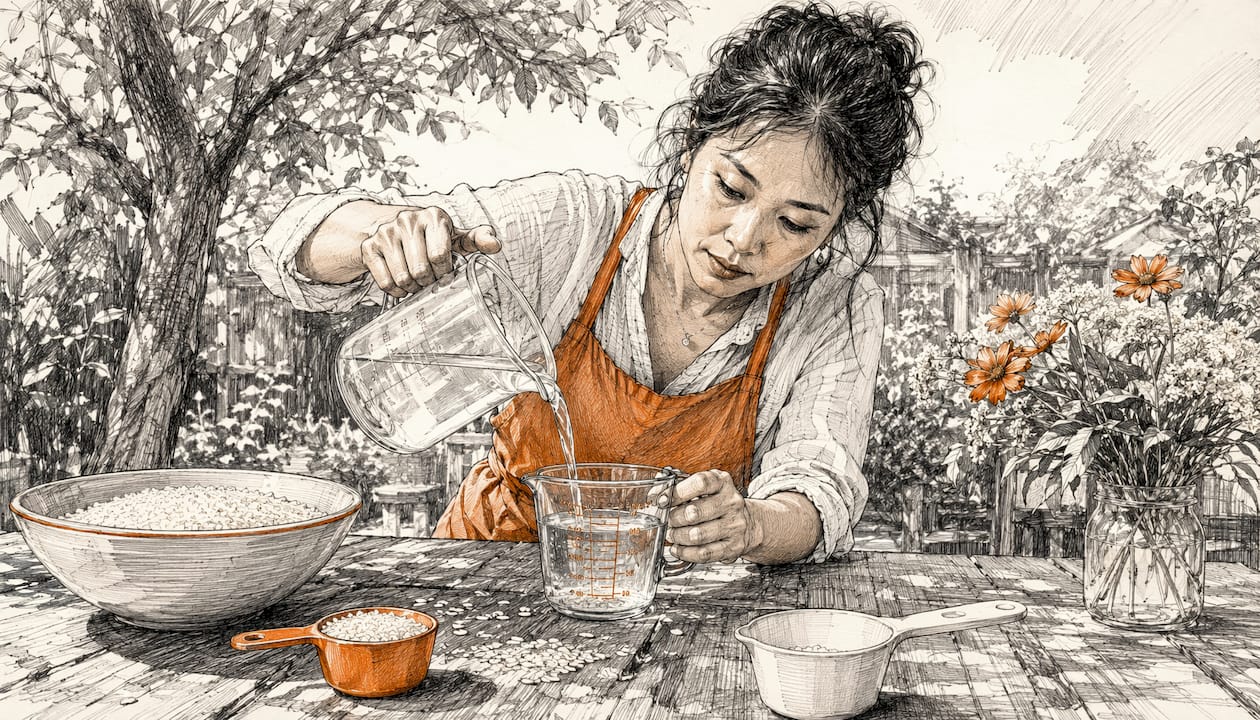
The foundation of repeatable results is simple: measure by volume using the same cup for both rice and water. A standard U.S. measuring cup holds 240 ml. Weight varies by variety and how tightly the cup is packed, but the conversions below are reliable starting points.
| Measure | White long-grain | Jasmine | Brown rice |
|---|---|---|---|
| Water needed (1:1.5) | 360 ml | 360 ml | 420 ml |
| Cooked yield | 3 cups | 3 cups | ~3–4 cups |
Scaling is straightforward once you have the ratio: water = rice × ratio. A few quick examples:
- Double batch: 2 cups rice × 1.5 = 3 cups water. Add an extra ¼ cup to compensate for evaporation on the stovetop, per Serious Eats' testing, which found evaporation adds a roughly fixed volume regardless of batch size.
- Half batch: 0.5 cups rice × 1.5 = 0.75 cups (¾ cup) water.
- Six servings of jasmine: Each serving is roughly ¼ cup dry rice, so 1.5 cups dry × 1.5 = 2.25 cups water.
When cooking large batches on the stovetop, evaporation stays roughly constant rather than scaling proportionally. That means a four-cup batch needs only about ¼ cup more water than the ratio alone suggests, not a proportionally larger addition.
Should you rinse rice, and how does it change the water amount?
Rinsing removes surface starch and any dust or debris, which produces a cleaner, less sticky result for varieties like jasmine and basmati. For short-grain and sushi rice, some cooks skip rinsing intentionally to preserve the starch that helps grains cling together.
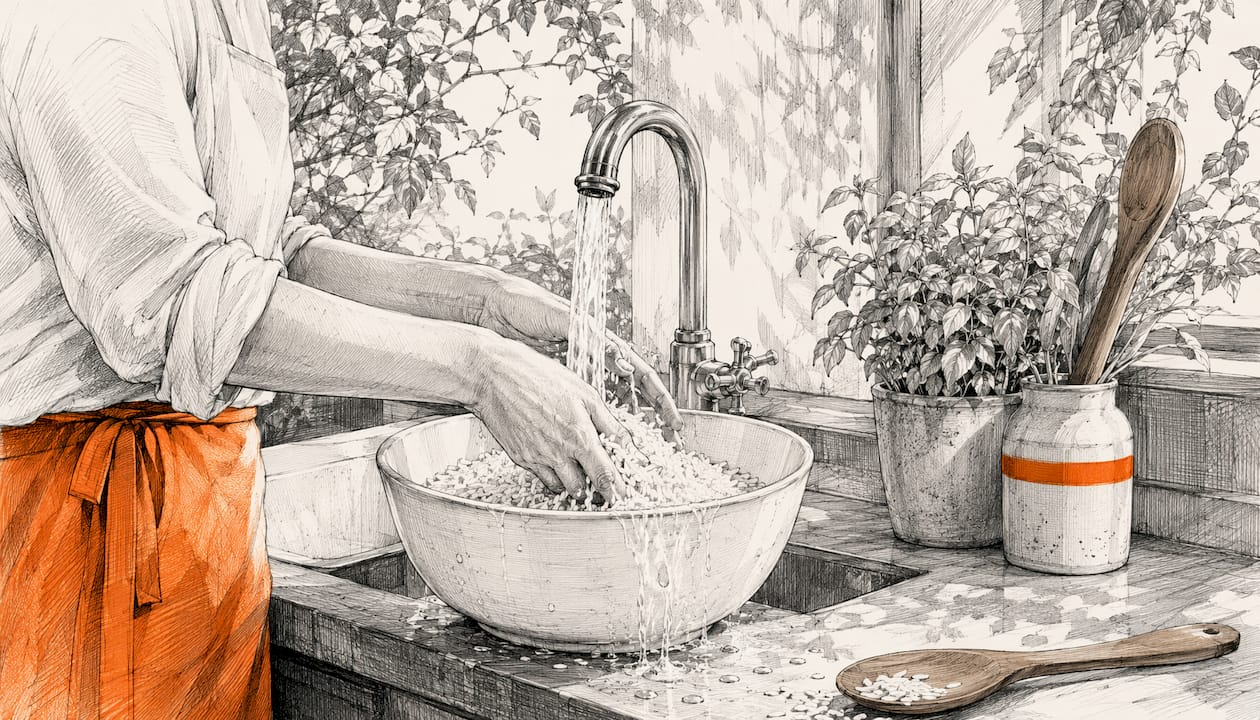
The practical catch: rinsed rice absorbs surface water during the rinse. Reduce cooking water by about 2 tablespoons per cup of rice after rinsing to avoid mushiness. Skipping that adjustment is one of the most common reasons a batch turns out wetter than expected.
Pro Tip: Weigh your rice before and after rinsing to see exactly how much water it picks up. The difference is typically close to 2 tablespoons per cup, which is why that adjustment is the standard practitioner rule.
Soaking is a separate step from rinsing. Basmati benefits from a 20–30 minute soak, which softens the grain and allows it to elongate more during cooking. Brown rice soaked for 30 minutes cooks faster and comes out less chewy. After soaking, drain the water and reduce cooking water slightly, by about 2 tablespoons, since the grain has already absorbed moisture.
One nutrition note worth knowing: many packaged U.S. rice varieties are enriched with iron and B vitamins. Rinsing washes away a portion of that water-soluble enrichment coating. If you rely on enriched rice as a dietary source of those nutrients, skipping the rinse preserves more of them.
Quick fixes when your rice goes wrong
Even with the right ratio, things can go sideways. Here is what to do in each scenario.
- Mushy or wet rice: Remove the lid immediately and spread the rice on a wide baking sheet. Let it sit uncovered for 5 minutes to release steam. Next time, reduce water by 2 tablespoons per cup and check that the lid fits tightly.
- Undercooked or firm rice: Do not add cold water. Add 2–4 tablespoons of hot water, cover tightly, and let the rice steam off-heat for 2–4 minutes. Steaming off-heat finishes gelatinization without making the grains gummy, which is what happens when you add water and return to high heat.
- Sticky clumps: Fluff immediately with a fork using a gentle lifting motion rather than stirring. Avoid pressing down. If the rice has cooled into a solid mass, a brief re-steam with a tablespoon of water and a tight lid for two minutes usually loosens it.
- Burnt bottom: Transfer the undamaged rice to a clean bowl right away. Do not scrape the scorched layer into the rest of the batch — the burnt flavor spreads quickly. Next time, use a heavy-bottomed pot, keep heat at the lowest possible setting after the boil, and consider the kitchen-towel-under-lid method.
The most common root cause of burnt rice is heat that is too high after the initial boil. Once the rice is simmering, the lowest burner setting is almost always correct.
How altitude, pot type, and added ingredients affect the ratio
High altitude lowers the boiling point of water, which means rice cooks at a lower temperature and takes longer to absorb liquid. Add 1–2 tablespoons of extra water per cup and extend the simmer time by 3–5 minutes. Check for doneness by tasting a grain rather than relying solely on the timer.
Pot type and lid fit matter more than most beginners expect. A heavy-bottomed pot with a tight-fitting lid traps steam efficiently, so you can use the ratio as written. A thin pan with a loose lid loses more steam, which means the rice can dry out before it finishes cooking. For a loose lid, add about ¼ cup of extra water per 4 cups of rice to compensate for that evaporation loss.
Pro Tip: A clean kitchen towel placed between the pot and lid absorbs condensation that would otherwise drip back onto the rice. This replicates the steam-release mechanism of a rice cooker and can prevent a soggy top layer without changing the water ratio.
Salt and oil have minimal effect on water volume. A pinch of salt seasons the grain from the inside and does not meaningfully change absorption. A teaspoon of oil or butter coats the grains lightly and reduces sticking, which is especially useful for long-grain white rice served as a side dish.
Sticky or glutinous rice is a different case entirely. It is traditionally steamed over water rather than cooked in it, so absorption ratios do not apply. Soak glutinous rice for 4–8 hours, drain, and steam in a bamboo or metal steamer for 20–25 minutes.
How the Apexapro rice-scaler formula works
The formula behind any rice ratio is straightforward:
Water (cups) = Rice (cups) × Ratio For jasmine rice at 1:1.5: 1.5 cups rice × 1.5 = 2.25 cups water (540 ml). To convert to grams: multiply cups by 240 to get ml, then use the density of water (1 g/ml) — so 2.25 cups = 540 ml = 540 g of water.
The Apexapro rice-scaler at apexapro.com applies this formula automatically and layers in the practical adjustments: rinsing reduction (subtract 2 tablespoons per cup), lid-fit evaporation allowance (add ¼ cup for loose lids), and method presets for stovetop, sealed rice cooker, and Instant Pot. You enter the rice type, number of servings, and cooking method, and the tool returns water in cups, milliliters, and grams simultaneously.
A worked example: scaling 1.5 cups of dry jasmine rice for six servings on the stovetop, rinsed, with a standard lid. The base calculation is 1.5 × 1.5 = 2.25 cups water. Subtract 2 tablespoons (0.125 cups) for rinsing: 2.25 − 0.125 = 2.125 cups, or about 510 ml. The tool rounds to practical tablespoon increments so you are not measuring fractions of a milliliter.
Key Takeaways
The single most reliable rule for home cooks: use the same measuring cup for rice and water, start with a 1:1.5 ratio for white rice on the stovetop, and always rest the rice covered for at least 5–10 minutes after cooking.
| Point | Details |
|---|---|
| Core stovetop ratio | Start with 1:1.5 (rice to water) for white long-grain, jasmine, and basmati; adjust from there. |
| Sealed cookers need less water | Rice cookers and Instant Pots work best at 1:1 to 1:1.25 because no steam escapes. |
| Brown rice needs more | Use 1:1.75 to 1:2.25 on the stovetop and allow 40–45 minutes of cook time. |
| Rinsing changes the math | Subtract 2 tablespoons of water per cup of rice after rinsing to avoid a mushy result. |
| Use Apexapro to scale | The free Apexapro rice-scaler converts cups, grams, and ml and handles rinsing and lid adjustments automatically. |
Why consistency beats memorizing every ratio
The rice-to-water conversation tends to focus on the number, but the number is only half the equation. The other half is consistency: same pot, same lid, same measuring cup, same heat level. A cook who always uses 1:1.5 with a tight-lidded heavy pot will get better results than one who uses the "correct" ratio but switches between a thin saucepan and a wide skillet every time.
The old 2:1 rule that appears on many package labels was calibrated for inconsistent stovetop setups with loose lids and variable burners. Modern method-specific ratios in the 1:1 to 1:1.5 range produce better results when evaporation is controlled. The shift is not about precision for its own sake. It is about understanding that evaporation, not absorption, is the primary variable, and that sealing the pot or using a rice cooker removes most of that variable entirely.
For beginners, the practical takeaway is this: pick one method, one pot, and one rice variety, and cook it the same way three times. By the third batch, the ratio will feel intuitive rather than something to look up.
The free Apexapro rice-scaler makes scaling effortless
Calculating water for a doubled batch or converting cups to grams mid-recipe is exactly the kind of friction that turns a simple side dish into a frustrating exercise. The free rice-scaler at Apexapro handles it instantly, no sign-up required.

Enter your rice type, serving count, and cooking method, and the tool returns the precise water amount in cups, milliliters, and grams, with built-in adjustments for rinsing and lid fit. It runs entirely in the browser, works in English and Spanish, and covers every variety in this article from jasmine to wild rice. Head to apexapro.com and use the rice-scaler the next time you cook.
Useful sources
- How To Cook Rice — USA Rice: Covers standard stovetop ratios, cooking times for white, brown, and wild rice, and the yield-per-cup benchmark used throughout this article.
- How to Cook White Rice — RecipeTin Eats: Detailed stovetop method with the rinsing adjustment rule (subtract 2 tablespoons per cup) and the case against the old 2:1 ratio.
- Basic White Rice Recipe — Serious Eats: Testing-based explanation of why evaporation is the key variable and how batch size affects the fixed evaporation allowance.
- How to Cook Perfect Rice on the Stove — CookSmarts: Source for the kitchen-towel-under-lid technique and stovetop steam management.
- Rice-to-Water Ratio Chart — Woks of Love: Multi-method ratio chart covering sealed cooker adjustments and the amylose explanation for texture differences by variety.
- Cooking with Rice — University of Maryland Extension: Institutional guidance on basic ratios and stovetop method steps, useful as a neutral reference for beginners.